Thrive Apprentice supports direct integration with WooCommerce as Version 2.4.0 released on March 24, 2021. The integration between WooCommerce and Thrive Apprentice is handled directly inside of the WooCommerce product setup and only requires the Thrive Apprentice Course to be published in order for it to work.
In this tutorial we'll walk through each of the steps, including a few extra settings you'll want to enable, in order to get this integration working. I've provided you with a full video walkthrough as well as a detailed step by step tutorial.
Step 1: Publish Your Course and Enable Access Restrictions
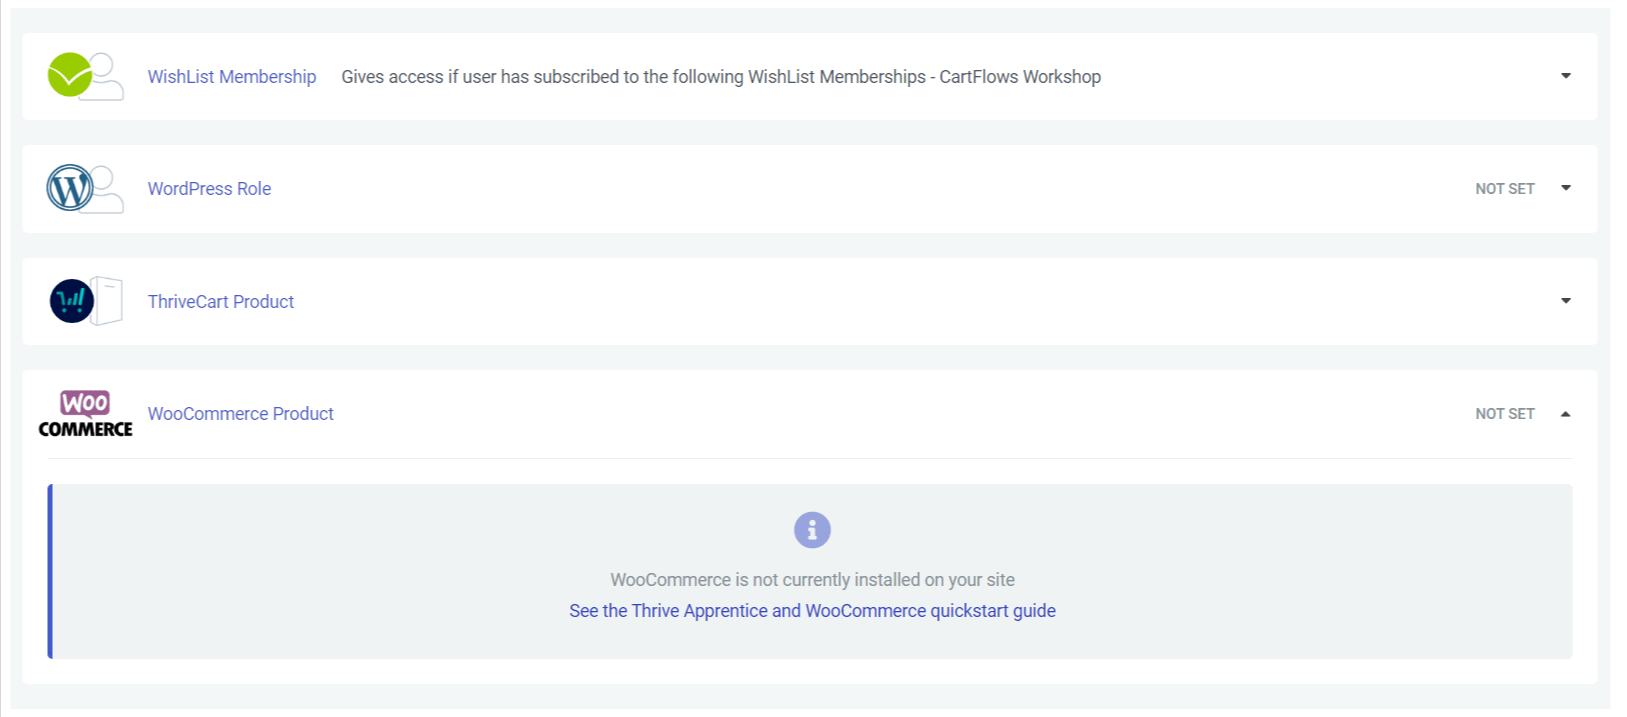
First you need to publish your course and enable access restrictions. You should see a section that says "WooCommerce Product" and when you expand that out you'll see that we need to handle all of the protection and restrictions inside of our WooCommerce product setup.
Step 2: Create a Product in WooCommerce and Link with Thrive Apprentice
Next, create your product in WooCommerce. This "product" is merely a placeholder in order for us to use the WooCommerce checkout experience. I recommend you name the product in WooCommerce the same as your course.
Inside of the Product data section of the Product creation page, find the Thrive Apprentice option in the sidebar.
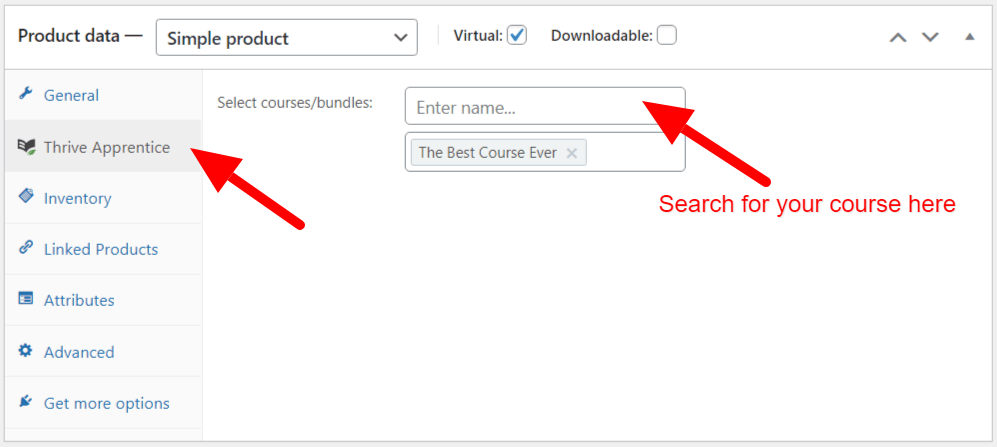
You'll then search for the course you wish to attach to this product. Once found, select it and it will be contained within the dropdown area.
You can now finish setting up your product sales page for a standard WooCommerce product page experience. I highly recommend you use Thrive Theme Builder to design your checkout experience. If you're interested in creating a sales funnel, I highly recommend CartFlows which will give your WooCommerce checkout a better look, the ability to use order bumps, upsells, and downsells. Perfect for a course funnel built in WooCommerce!

Thrive Theme Builder + WooCommerce WorkShop
Need help figuring out how to use Thrive Theme Builder with WooCommerce? I personally run 5 ecommerce websites with Thrive Theme Builder and I've set up dozens of them for my clients. I poured all of my knowledge about TTB and WooCommerce into this special Bonus Workshop as part of the Thrive Theme Builder Essentials Course.
This Bonus Workshop is a great way to learn the ins and outs of using Theme Builder with WooCommerce. We walk through each template, show you what's customizable, discuss my recommendations, and learn a great trick for how to build beautiful product pages.
Step 3: Enable Account Creation at Checkout
In the WooCommerce settings we need to adjust a few settings to make sure users need an account in order to check out, and that we allow them to do so during the checkout step.
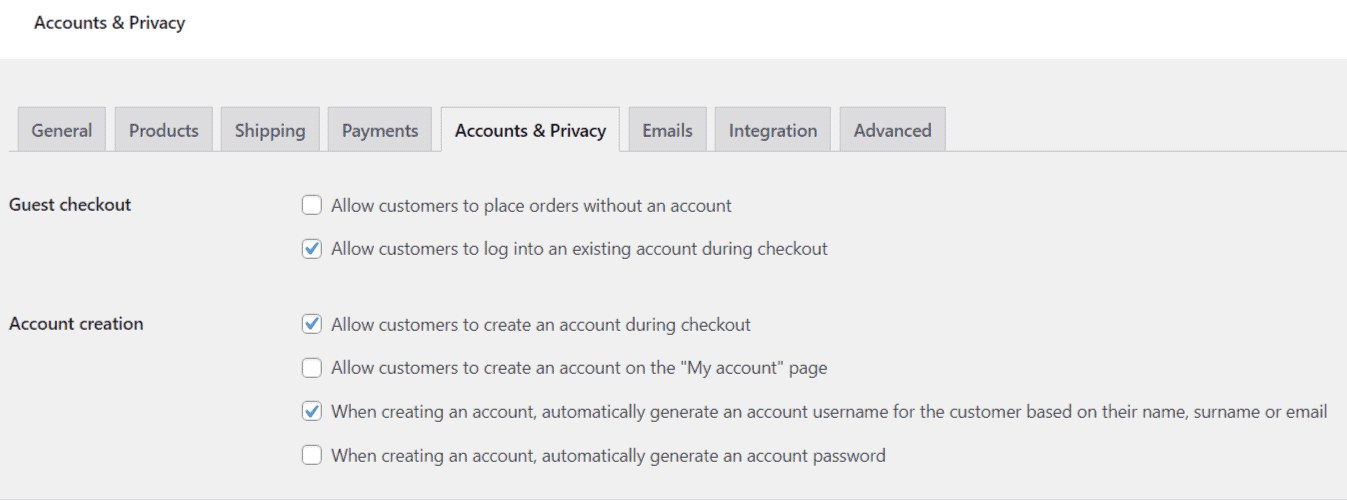
- Uncheck the box to allow customers to place orders without an account
- Check the box to allow customers to log into an existing account during checkout
- Check the box to allow customers to create an account during checkout
- Check the box so that when creating an account, their username is their email
Step 4: Configure Your Login Page
I recommend you set up a custom login page and do not rely on the WooCommerce login system entirely. This will allow you to curate that custom experience for your users that will feel unique to your platform.
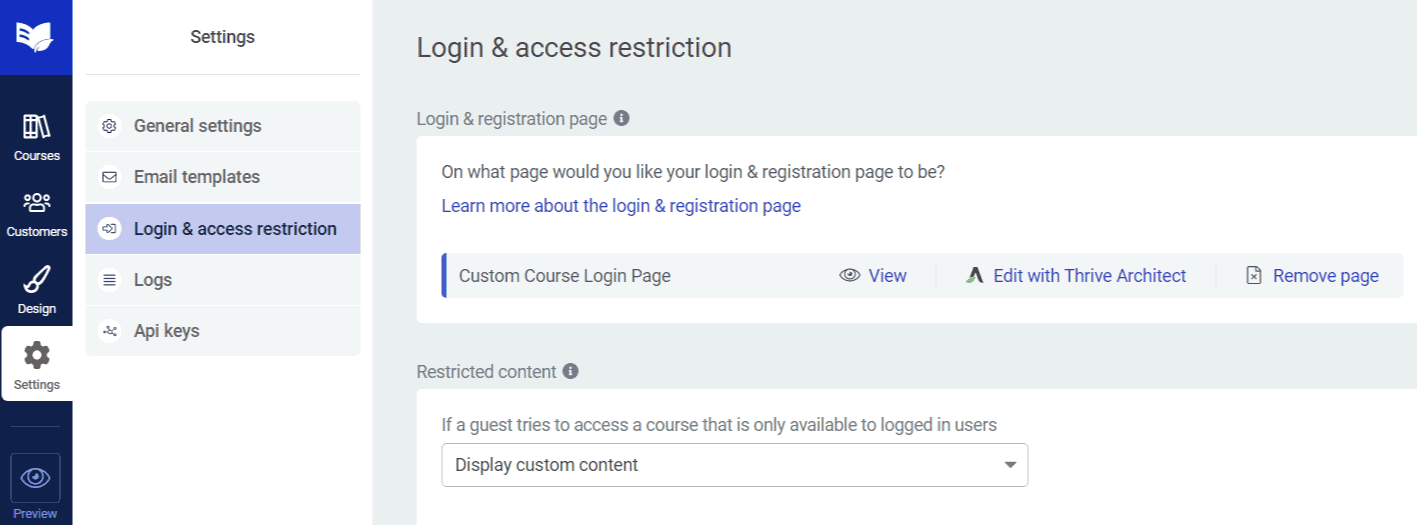
Under the Settings > Login & access restriction section of Thrive Apprentice, find the "Login & registration" page section. Create a new page and edit that page using Thrive Architect. Now you can fully customize this page using the Login and Registration Form element.
I recommend you do two things:
- Set this form as a login form only
- On successful log in, redirect to the Thrive Apprentice course index (this will be for users who visit this page to log in only. If someone hits an error page that requires login, they'll be redirected to the lesson or course they tried to access)
Step 5: Set Up Error Pages
The last step is not required, but I like to use Thrive Apprentice's access restriction and error pages to provide an even better user experience, and one that will convert new users into customers are a much higher rate.
Under access restrictions find the section right below the toggle for restrict access that deals with "if a guest tries to access..." and "if a user tries to access..."
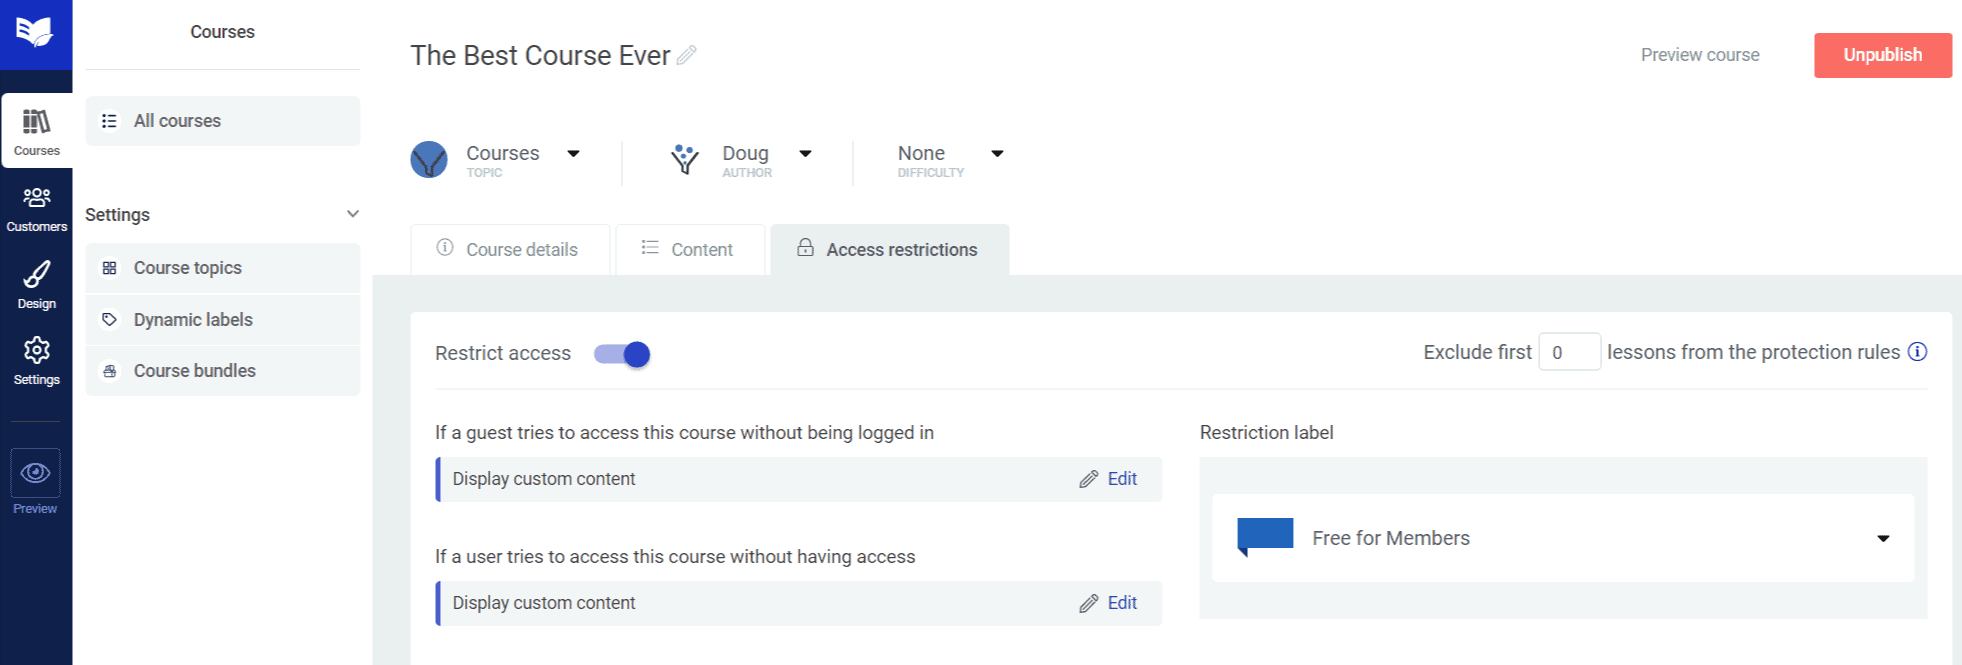
In these two sections we can choose what happens if someone isn't logged in and tries to access your course and what happens if someone is logged in but doesn't have access.
If someone isn't logged in
This user MAY still have purchased the course! We don't want to immediately send them to a sales page. So instead, I like to use the "display custom content" option or "redirect to a custom page". I then like to adapt that content so that the user is provided with a button to log in (that takes them to our login page we already made) or a button to the sales page to enroll in the course.
If someone IS logged in but hasn't purchased the course
Since they're already logged in, we know they don't have the course. In this scenario it's perfectly reasonable to send them directly to the sales page. However, I've found that I sell more courses when I let the user see a custom bit of content first that says a few highlights about the course and lets them know it's for enrolled students only... and then provides them with a button where they can go learn more. It's a softer approach that works better for me.
Customize Your Funnel Further
You now have all of the essential elements for a WooCommerce + Thrive Apprentice sales funnel! You can refine this funnel with just a few more tweaks:
Emails
By default, WooCommerce will email a default template emails to your customers that you can't customize. Use FluentCRM to trigger automatic emails to your customers when they buy a course. This customized email can contain information about the onboarding process and make the entire experience feel more complete.
Custom Dashboard
Since you're using WooCommerce, learn how to make a custom dashboard for your users. This is a great area for you to link over to your courses, promote other products, or show them how to access your Facebook group.
Custom Course Index Page
Thrive Architect allows you to customize the way users interact with your Course Index. Instead of using the default course index that comes with Thrive Apprentice, build a custom one and link to it from your WooCommerce account page or custom dashboard!
---
Make the experience unique to your brand, your voice, and match the experience they'll encounter when they take your course. Use what I've provided here as a starting point and a reference and see what you can come up with! If you have any questions, feel free to comment below.
Excellent as always. A question. Once the transaction is complete one ends up on the std woocommerce order confirmation page. U mention that you can edit that page to have a button, for example, to head over to the course index page. The only way I can see to do that is by editing the template in TTB. The template is the checkout page template which means the button would appear on both the check out page (not ideal) and the order confirmation page. How to get a button just on the order confirmation page?
The way that I do this is with CartFlows. You can to fully customize the confirmation / order completed page. I’m going to make a video on this soon with training, but CartFlows is an absolute must for me if I’m going to use WooCommerce (with Thrive Apprentice or not).
If you’re selling multiple courses through WooCommerce (as well as other products) – when they get to account creation part, will those details apply to all of the courses they purchase at that time?
hen users checkout, they’re given the option to log in as well as register. When the user buys their first product and creates an account, that becomes their only account tied to that email. Future purchases made under the same email will be added to the account if they log in. If they try and register a new account at that email then it will say it already exists.