In this Tutorial, I’m going to show you how to create a checkout form in SureCart that allows you to have multiple different pricing options. And what’s neat about this is that these pricing options can be for the same product or they can be for completely separate products
This is really easy to do. It’s all handled within SureCart right within your own website. You don’t need any additional tools unless of course you wanted to add your form to a page like you’re looking at right now, which is what I do. I just drop a short code right into Thrive Architect and it works great.
So if you’re interested in learning how to build a form like this with multiple pricing options, stick around and I’ll show you how to do it. To get started.
Create a Product with Multiple Price Options
The first thing that you need is a product that has multiple pricing options.

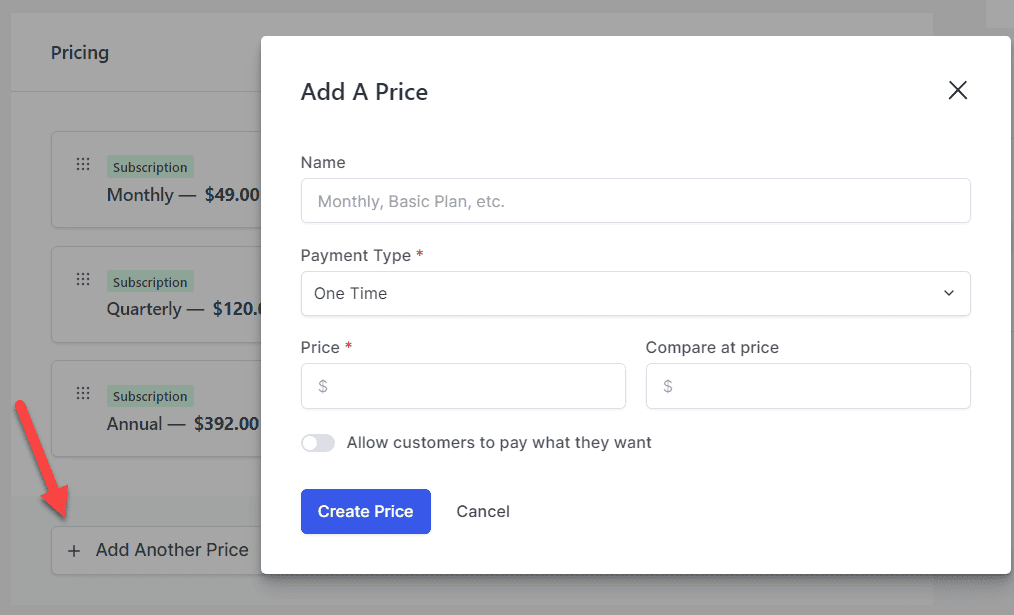
Head over to the products section and create or edit your product. Scroll down to the pricing section and click “Add Another Price”. This opens up the “Add a Price” window where you can configure your pricing.
TIP: SureCart now allows multiple prices of the same type. For example, you can have multiple one-time prices and multiple monthly subscription prices for the same product. As you’ll see later in this tutorial, we can select which we want to add to our form.
Create a SureCart Form
Once you have your pricing done on your product, it’s time to head over to the SureCart Forms section by going to SureCart on the left-hand side and then going to Forms.
Let’s walk through the process of setting up a form similar to how I set up my community membership one.
- Click Add New next to Checkout Forms and give your form a title.
- Choose a starting design. The default is a great starting place.
- Don’t add a base product (yet) to your form
Here’s the key for the price selector. You don’t want to add a default/base product to the form because that would mean there’s a product on your form that someone will have to buy no matter what. And then any price selector options that you added would be in addition to the default product.
So let’s go ahead and leave this blank for now. And if you want to and it makes sense for your form, you can add one later.
Add a thank-you page if you want one, then click create.
How to add a Price Selector Block to a SureCart Form
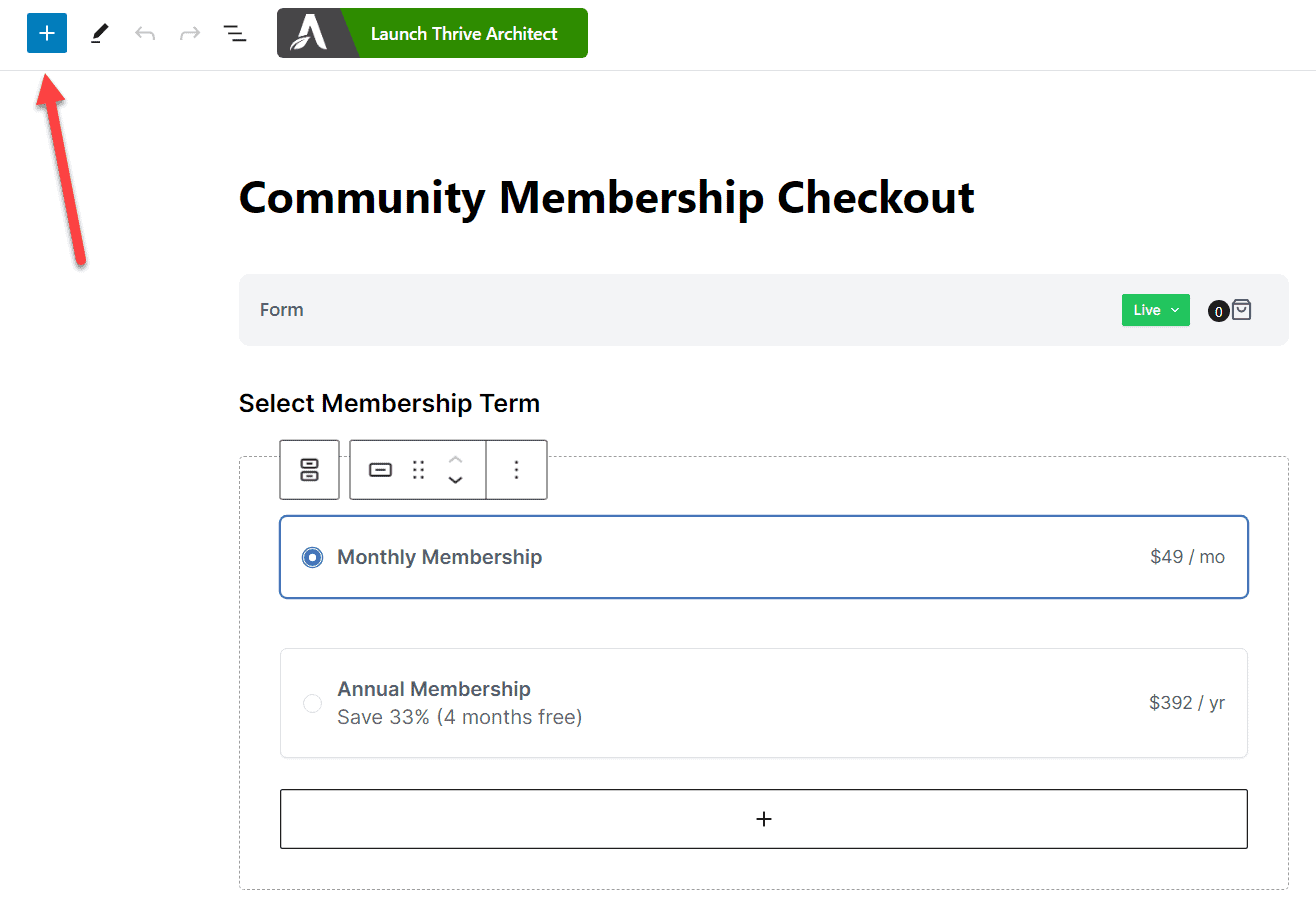
The easiest way to add a price selector is to click the blue box with a plus inside it. If your button isn’t interactive and you can’t click on it, click on a block in your form and the button will activate.

Scroll down and under SureCart we can find our price selector. Click on the price selector or drag it into your form where you want it to go.
Next click the wide box with a plus in the middle in the Price Selector block you added and select a product and price point to add to the price selector.
Customize the Products in the Price Selector Block
On the right hand side, we have some options. You can add a label to this such as choose a plan, something like that, to kind of give them the idea that they’re choosing a plan to purchase. And then you can decide whether or not they can select one or many.
How to add a base product into the SureCart Form after it’s created
At the start of this tutorial we didn’t select a base product because we wanted a setup where the customer selected the price choice. However, there may be a reason to include a base product in your form AND have a price selector.
Example use case: You sell a one-off product with a community component.
To add a base product, in the gray bar at the top that says “Form” there’s a bag icon to the right right. Click the bag icon and you’ll see that you can add a form. Any product added here will be in addition to whatever is selected in the price selector.
Hi! Thanks for the information, very helpful!
I’m running into an issue when adding the Product Options Selector into a form.
I have setup a product (recurring donations, pay what you want), where I want to add a few variables to the form. However, the product is not shown as an option in the Selector.
Do you have an idea what settings are preventing the product from showing up?
Thanks!
When using Pay What You Want you need to set the product itself to have a price listed as Pay What You want. Then you select the product from the Pay What You Want block. You can’t have a PWYW product in a product options selector, only selected within the PWYW block in the Custom Form.