Deadline Funnel integrates well with FluentCRM, but there are four key things you have to do in order for it to work. This tutorial will walk you through the key steps for connecting these two tools. For a complete step-by-step setup of Deadline Funnel and FluentCRM, watch my tutorial below.
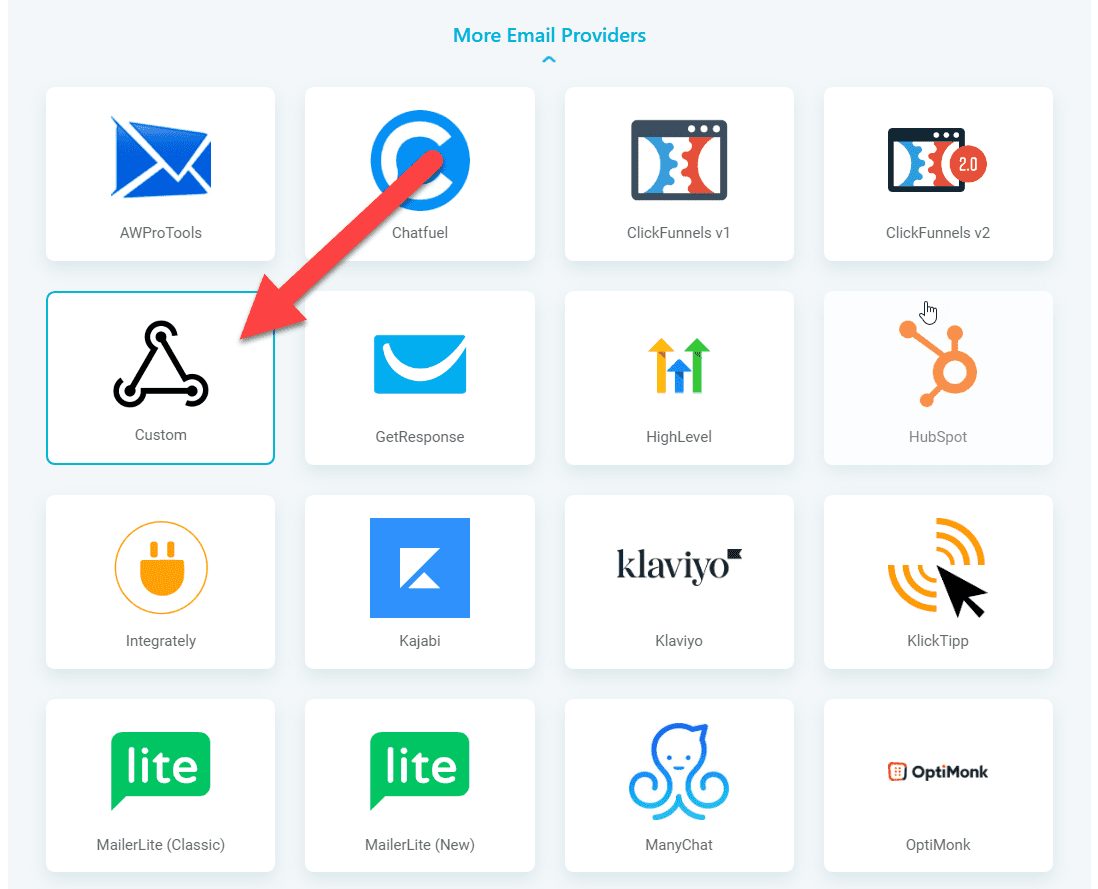
Choose “Custom” for Email Provider

Add FluentCRM’s Email Merge Code to Your Deadline Funnel Links
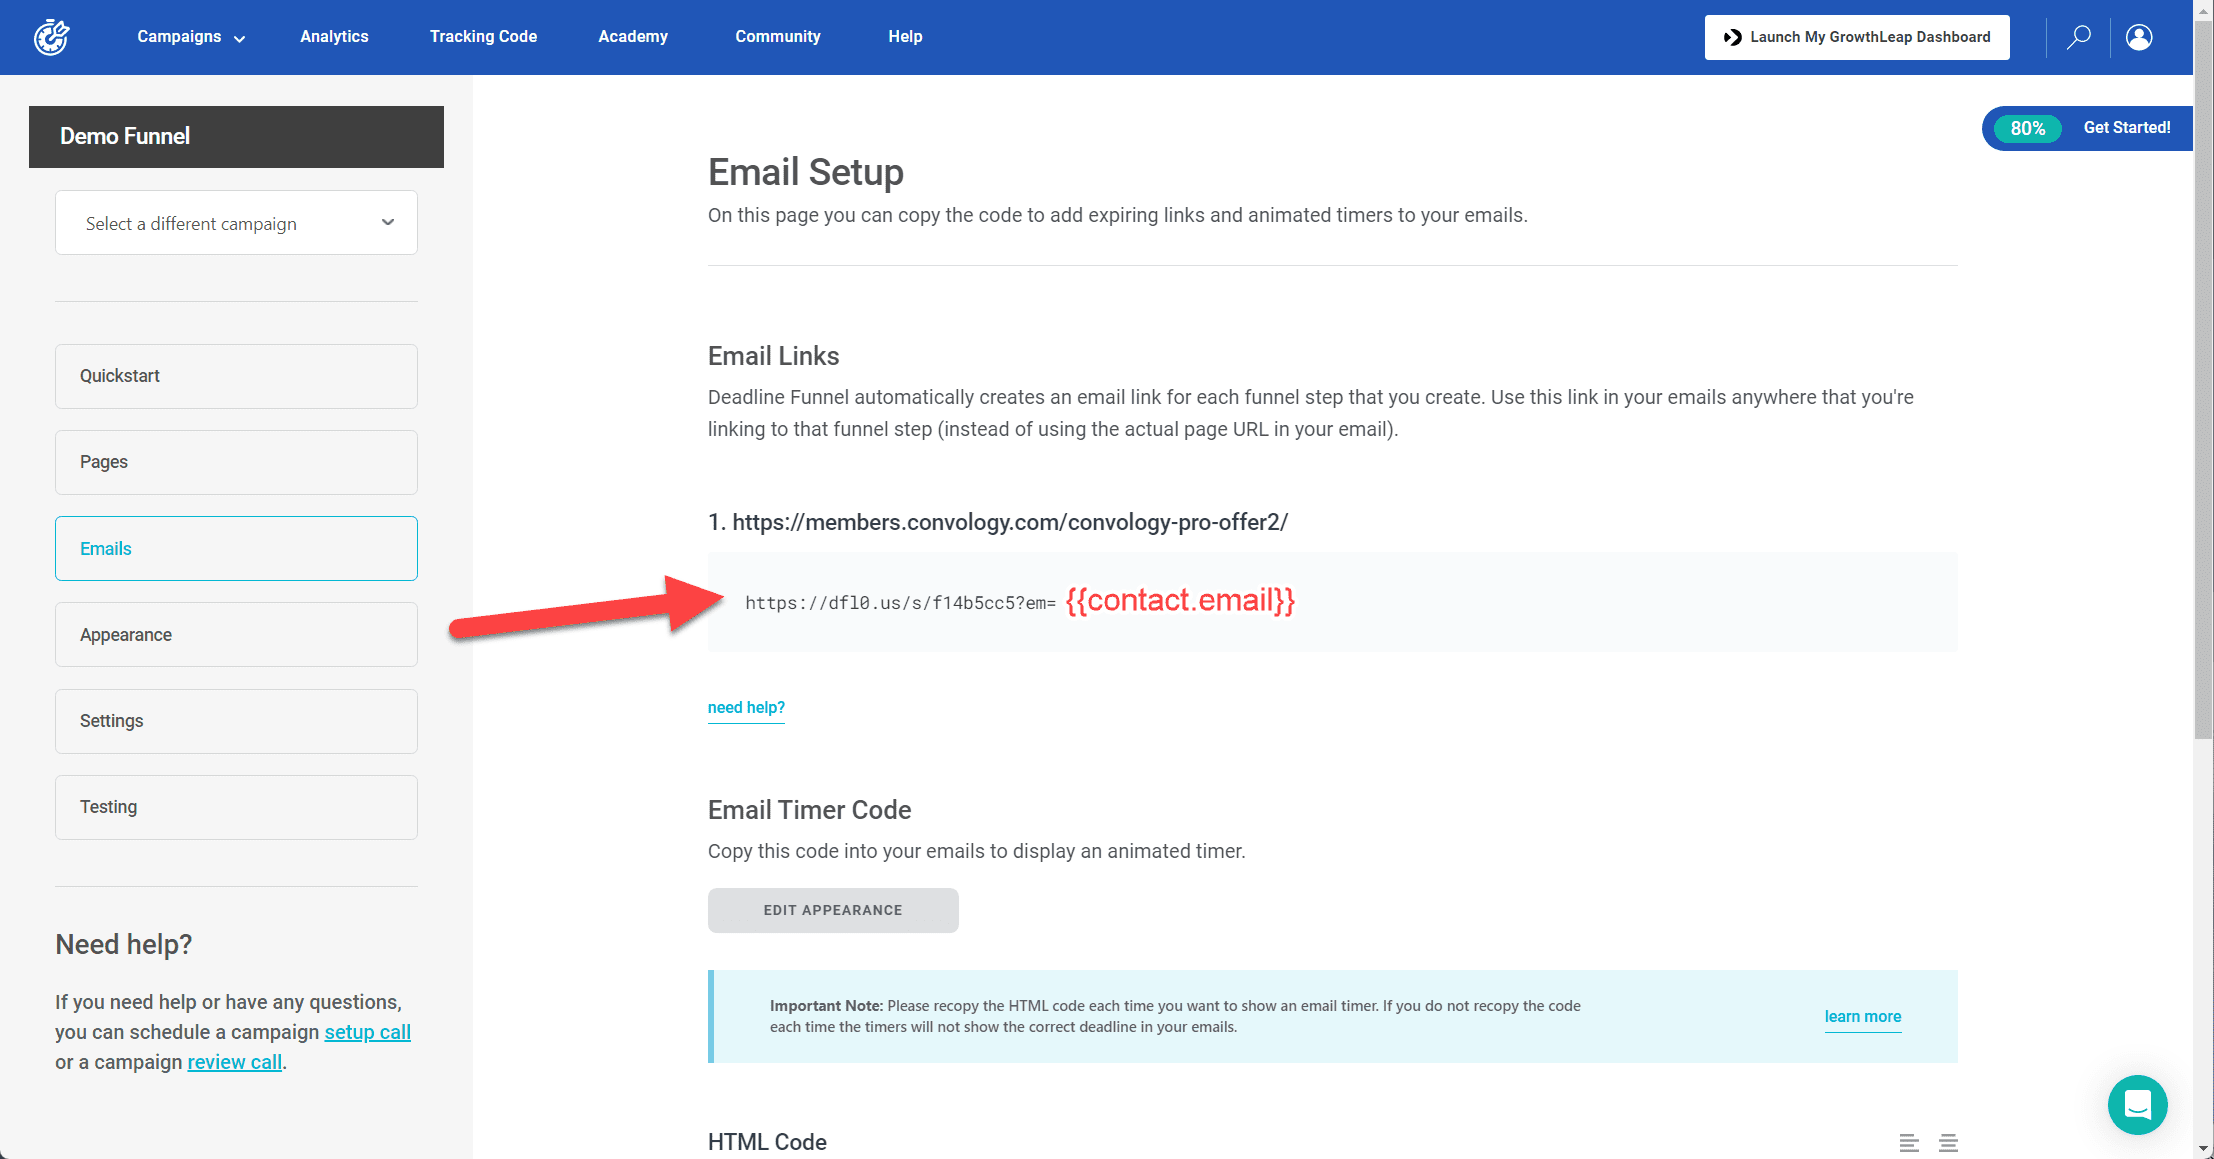
In the Emails section of your Deadline Funnel campaign you’ll find your Deadline Funnel Email Link. This link is what you must put into FluentCRM when linking to your offer page.
However, by default it’s missing something very important: The user’s email address.
To add the email address dynamically into this link, we need to use FluentCRM’s merge codes.

Copy the link and paste it into a notepad or text editor.
After the ?em= part of the link, add the merge code: {{contact.email}}
When inserted into the email copy of a FluentCRM email, this link will automatically insert the person’s email address into the link thus allowing FluentCRM to recognize this user.
Add the Email Merge Code to the Countdown Timer HTML
Similar to the email link merge codes, we need to add the same merge code to the email timer HTML.
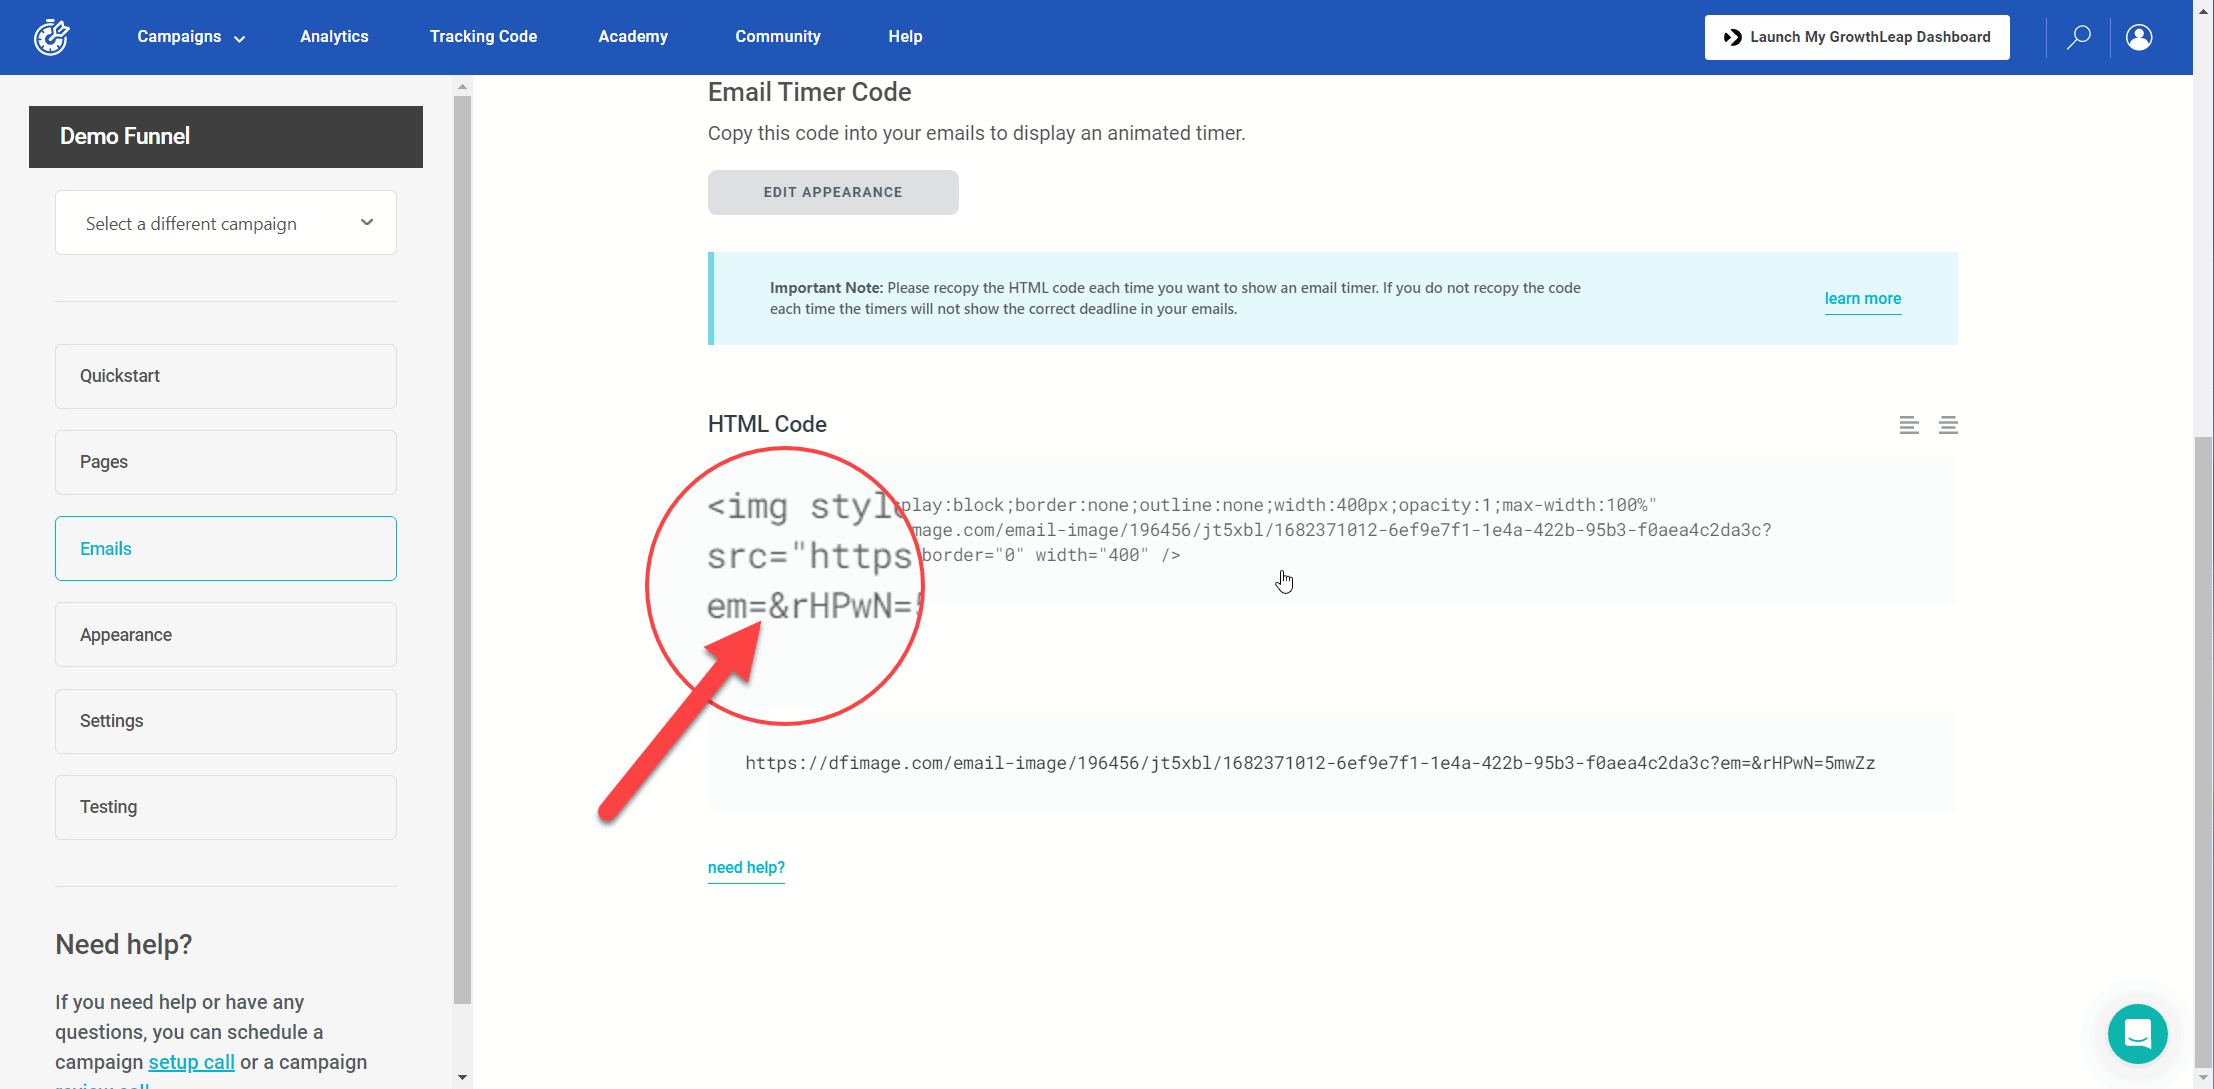
In the same Emails area of your campaign find the “Email Timer Code” section and copy the HTML Code.

You’re looking for the same part of the code that says ?em= and between the = and the & you need to add the merge code again: {{contact.email}}
If you skip this step, your countdown timer will not show the accurate time to the user because it won’t have any idea which user is seeing it. By dynamically inserting the email, Deadline Funnel knows what time to show in the email.
Start Deadline Funnel Campaigns from FluentCRM
In order to initiate a Deadline Funnel campaign, we need to send an outgoing webhook from FluentCRM to Deadline Funnel. This can be done within the same email automation you’re using to deliver your freebie to your contact.
To find your “Custom” webhook link, navigate to Campaigns > Integrations from the top nav inside of Deadline Funnel.
Click on “Edit Integration” on your campaign.
Select “Custom”.
Copy the provided webhook URL.
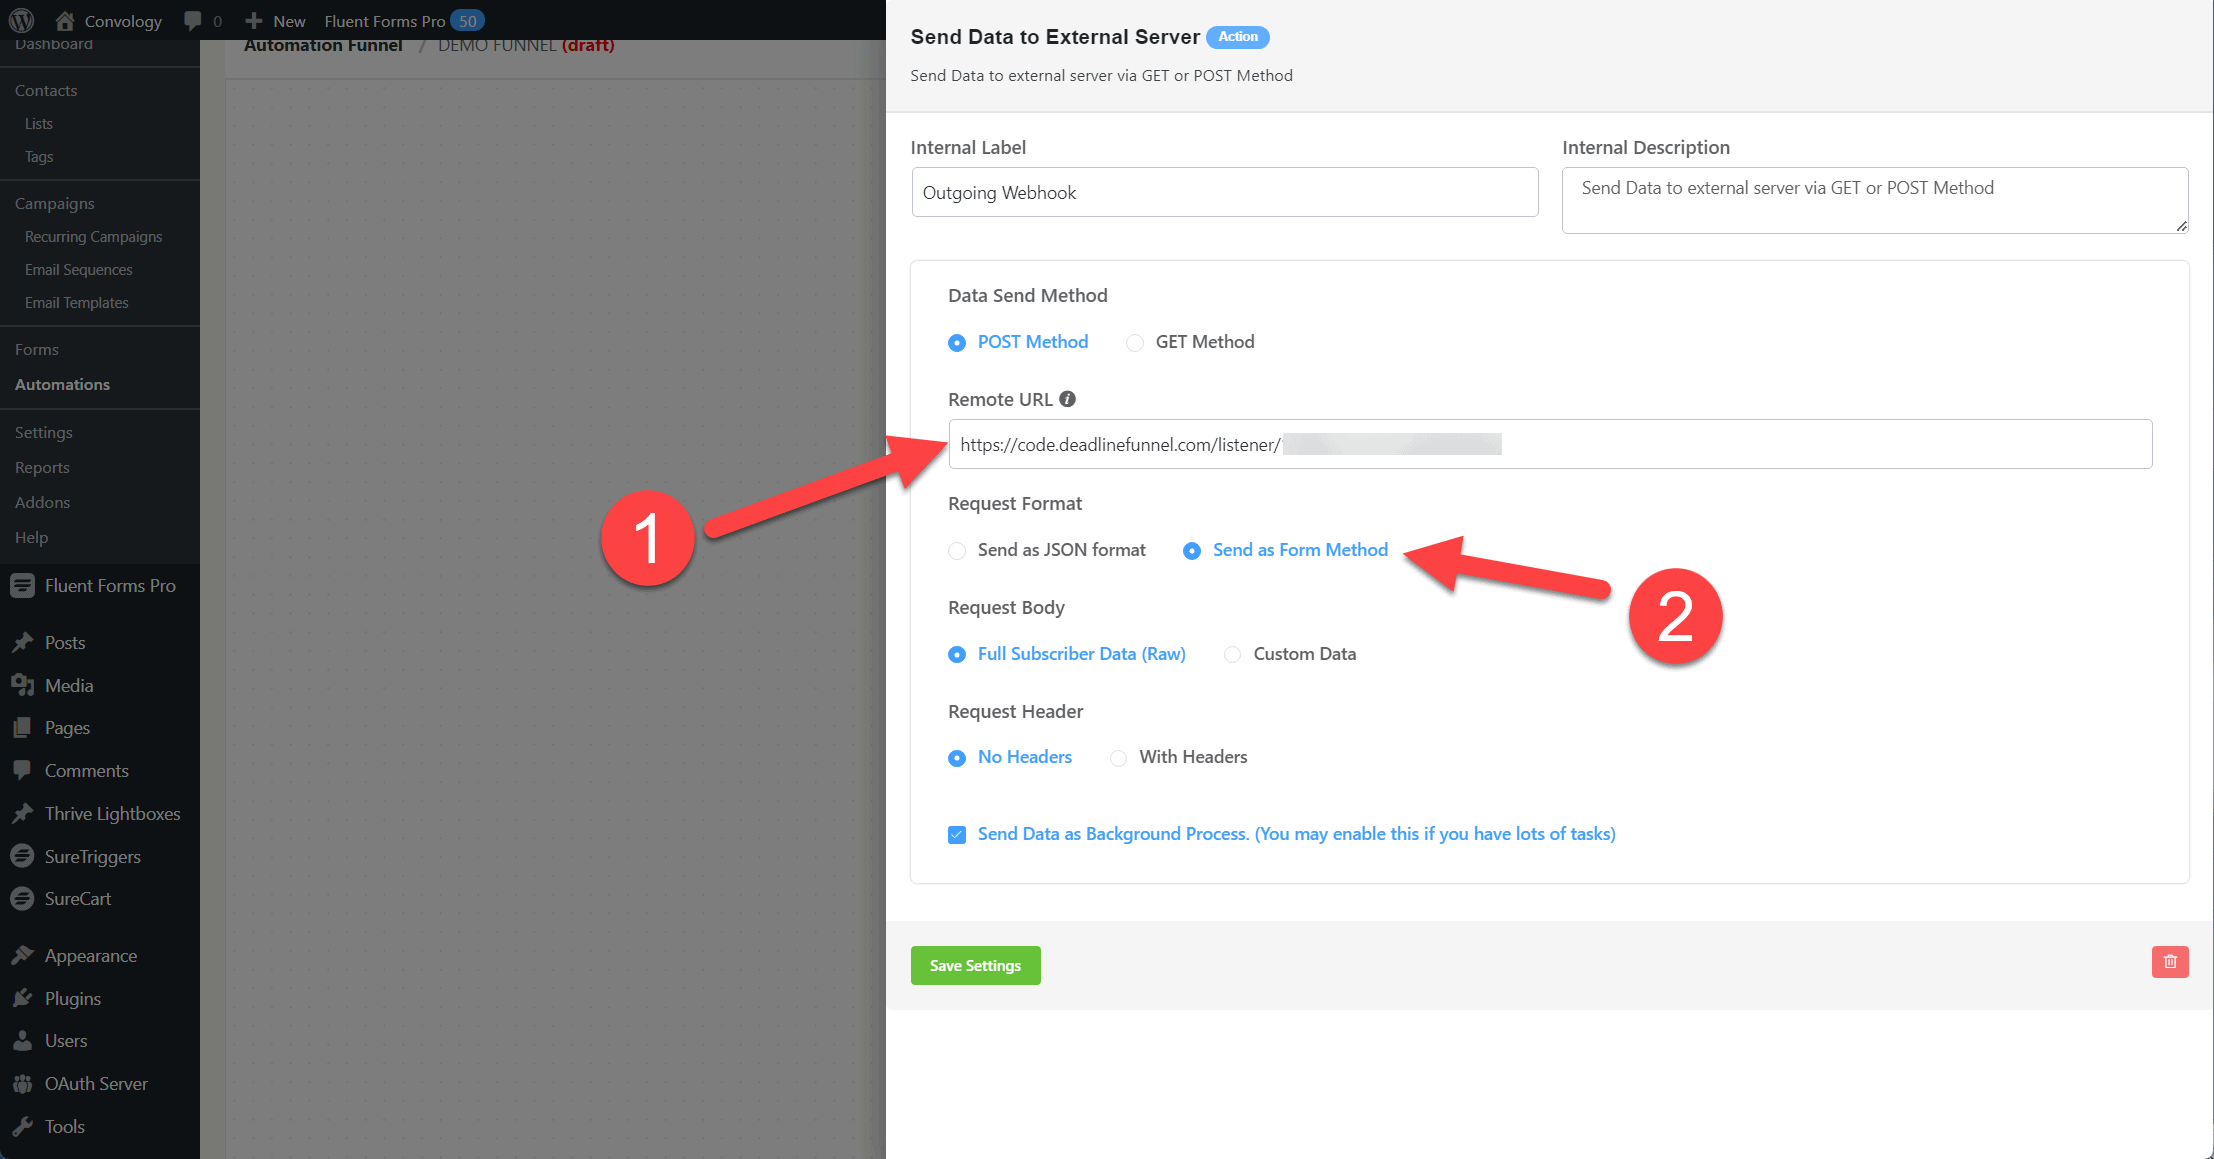
Go to your FluentCRM automation and add an outgoing webhook.

Paste in your webhook URL you got from Deadline Funnel. The only other change we need to make on this webhook action is to change the “Request Form” to “Send as Form Method”.
You’re all set!
My Deadline Funnel and FluentCRM Funnel Setup
If you would like a complete video walkthrough of my personal Deadline Funnel setup, including all of the steps above, check out my tutorial video below.