This migration guide outlines the process for migrating to Thrive Apprentice from any other course or membership platform. While the process is not complex, there are many steps that can be neglected or forgotten along the way.
I will keep this guide updated with my latest recommendations and tutorials. Last updated Q4 2022.
We'll make two assumptions in this guide.
Assumption #1: You have Thrive Apprentice installed on your WordPress website and you have a general idea of how it works or you're willing to figure it out yourself. We'll go over some of these things in this guide, and I have extensive resources on this site about it, but if you are already confused then I recommend my Thrive Apprentice to Master course. If you want the complete setup guide from start to finish, all in video format where we dive deep into each topic covered in this migration guide, then you should check out it out.
Assumption #2: You're migrating from another platform. I'll cover migrating from a WordPress solution where users already have their accounts on your website as well as from an external platform like Kajabi or Teachable.
If that's sounds good to you, let's get started!
Tools You'll Need
- Thrive Apprentice (mandatory)
- Thrive Architect (mandatory)
- Thrive Theme Builder (recommended)
This guide is linear. That means I recommend you go in order and do not skip any steps. In some cases, the order in which you complete these steps matters, and will save you time and the frustration involved with getting stuck.
Create Courses or Content to Protect
The first mistake most people make when migrating to Thrive Apprentice is thinking that they need to set up all of their tech stack connections and funnels first. It's actually the opposite.
Make your courses in Thrive Apprentice and create your pages in Thrive Architect first.
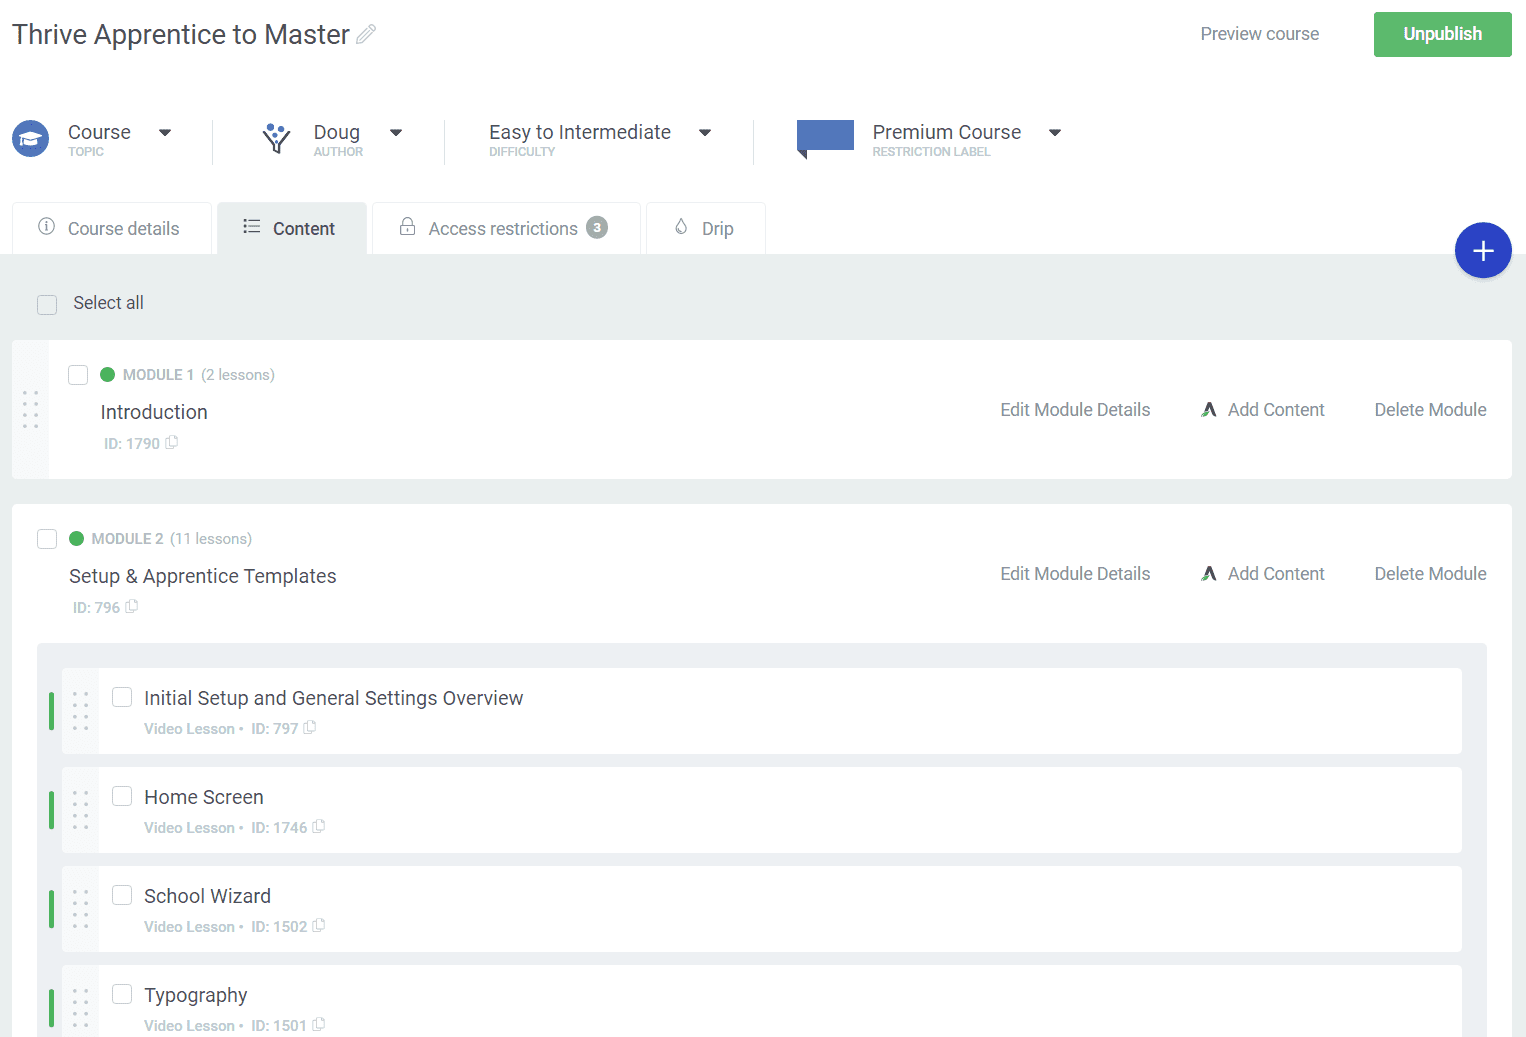
Even if you content is just in draft mode, it needs to be created first. That way you can add it to Thrive Apprentice products.
Create Thrive Apprentice Products
Thrive Apprentice Products are what someone actually gets access to when they buy a course, join a membership, or sign up for a free piece of content you protect. Think of products like membership levels. They're containers that hold the things you want to protect.
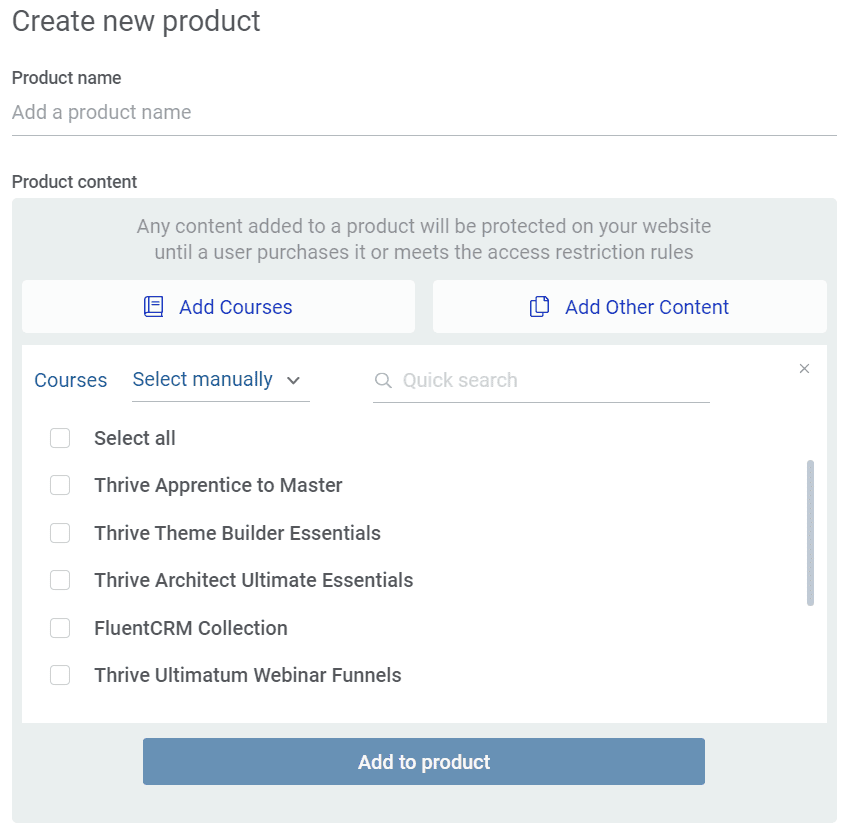
Anything on your site can be added to a product. Blog posts, pages, categories, tags, courses, etc.
You can make as many products as you want, and the things you're protecting can be inside more than one product.
For migrating, you want to create products in Thrive Apprentice that mirror the content people would have bought or had access to in your other platform. For example, if people bought one course from you at a time then create a product for every course. If people bought bundles, create a product for bundles.
For additional resources on Thrive Apprentice products, check out these resources:
Account Creation / Invitation Email
Next we want to set up the email that your website will send to all of the users you import. We're going to navigation in Thrive Apprentice to Settings > Email templates> New Account Created.
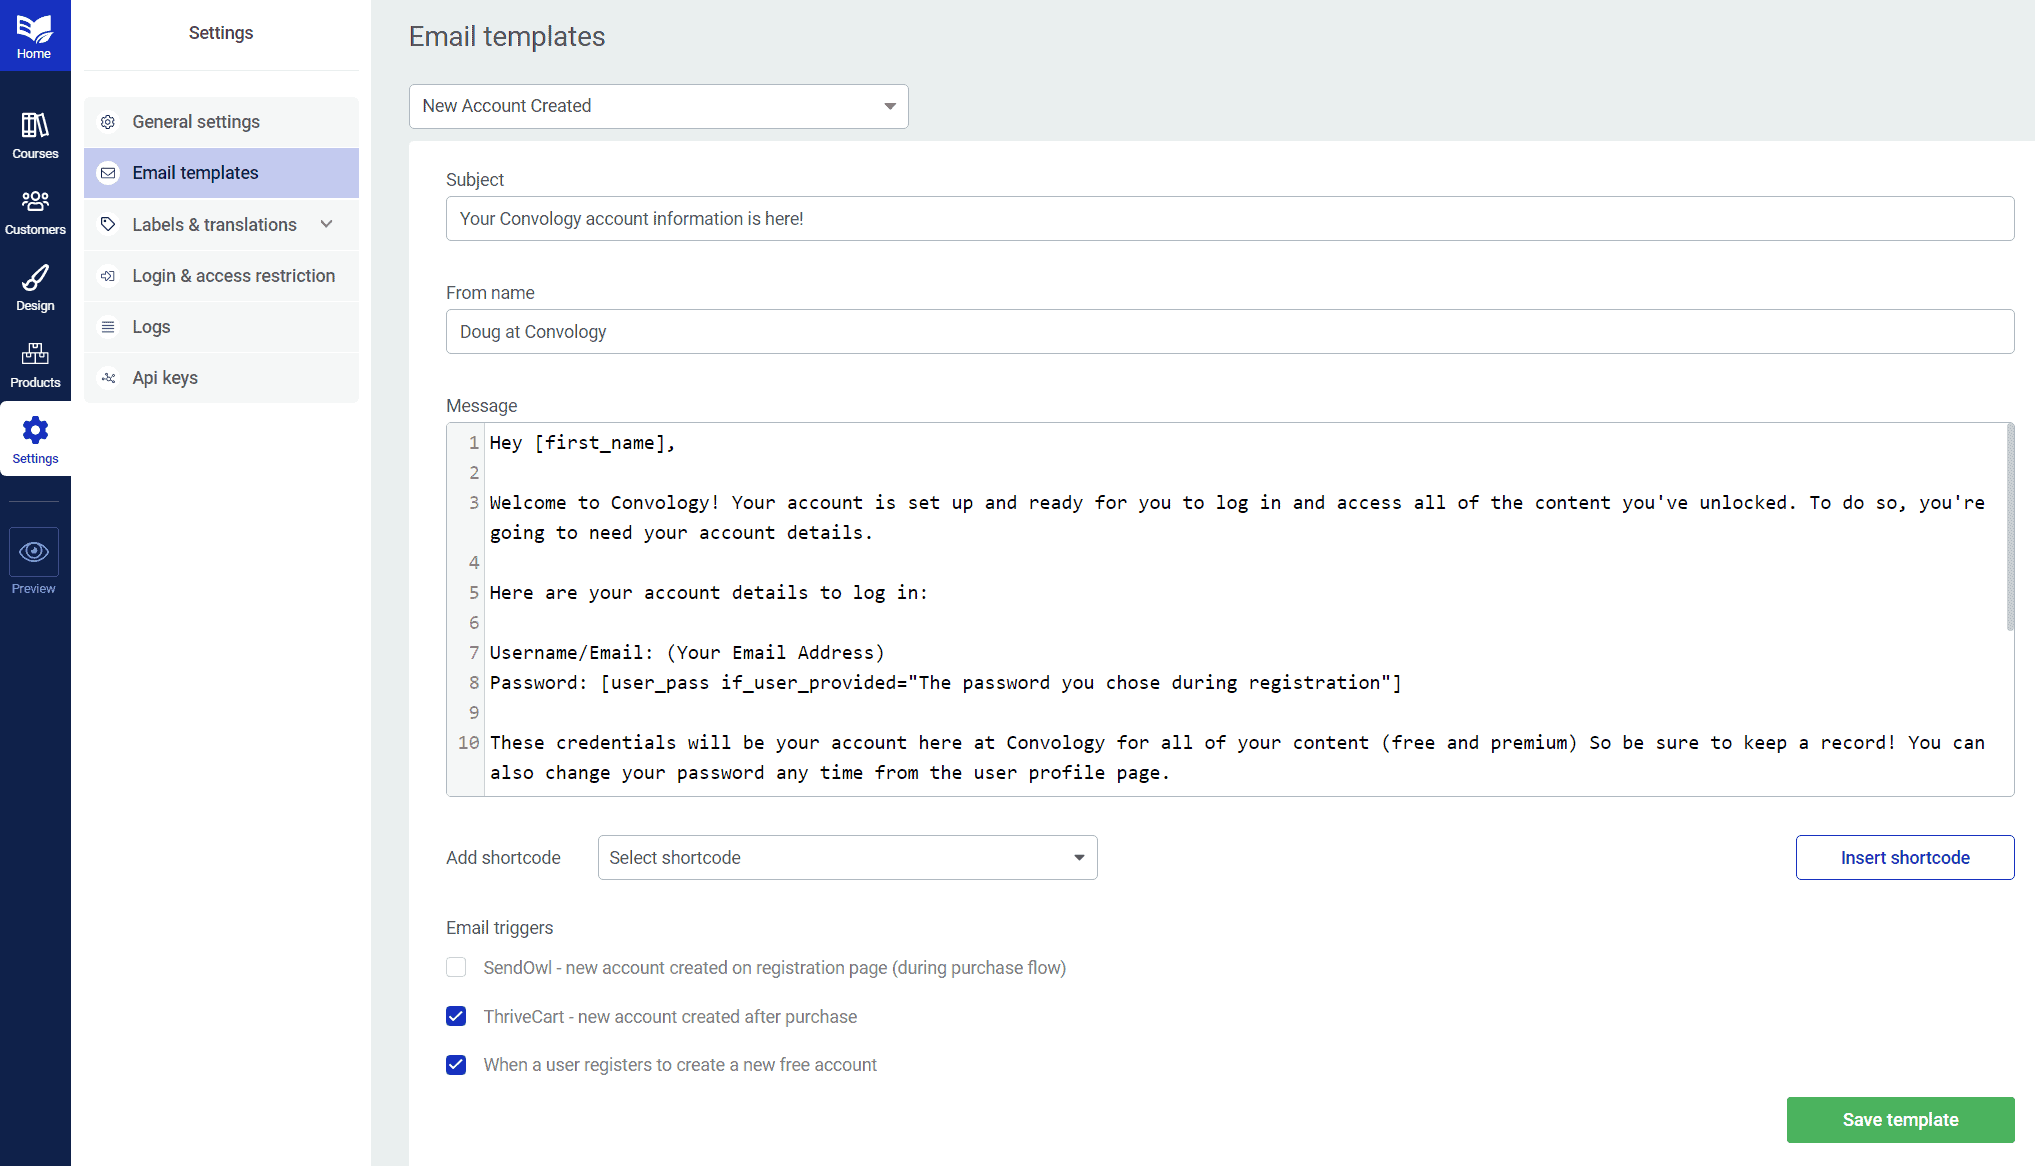
Here you'll find a default template that you can edit. You'll want to leave the password shortcode that's in brackets, as shown in the picture above. This is where the system will generate a password and place it for your users to find right inside the email.
This email will also go out to all of the users who sign up for your products in the future, whether by getting a free account from a lead magnet or through ThriveCart (if you choose it as your sales cart tool).
You'll want to check the box "When a user registers to create a new free account".
NOTE: Are your users already registered as WordPress users on your site? They will not receive this email, but you will still want to set it up for future users.
Create the Necessary Pages for a Great User Experience
In addition to the setup process you need to go through for all of your Thrive Apprentice templates, you'll want to create the following pages in order to provide the complete experience for your users. If you need additional help on the initial Thrive Apprentice setup, my Thrive Apprentice to Master Course goes over everything.
Create a Login Experience
There are several ways to create a login flow for your users. That's what I love about Thrive Suite. However, not all of them are a great experience for the user.
I have a video all about the login experience in Thrive Suite and it's full of little details you might easily neglect.
My favorite login experience combines the use of a login form and a member dashboard using conditional display. I covered that in the video, but I want to emphasize that it's a great option when you want all of your users to be sent to a central hub and you want to do that automatically without users ever having to go to a separate login page.
Create a Member Dashboard
I recommend creating a nice member / student / user dashboard as a central place for your users. I have a complete guide on how to create a dashboard for Thrive Apprentice with a video that goes along with it.
If you'd like, you can check out my design packs to purchase my member dashboard template.
Using a dashboard like this allows you to place all of your courses using a filterable course list to customize it for your users, and give them calls-to-action and notifications about upcoming events and important news. It can also be a great opportunity for upsells to show users all the great things you have that maybe they don't have access to yet.
Create a 'User Profile' and Account Management Page
If you'd like to create a simple way for your users to update their name and email address, and you aren't using a cart tool that provides one for you (like Woocommerce or SureCart) then I recommend a user profile page built using Thrive Architect. Here's a video guide for how to create one:
These pages are mostly for new users. Existing migrated users from non-Wordpress platforms will need to have their billing and accounts managed externally.
Customer profile page for SureCart
If you're using SureCart or plan to use SureCart, this account page is already created for you and integrates with things like downloads, receipts and invoices, payment methods, subscriptions, and things like that. Check out my tutorial on how you can use SureCart and Thrive Architect to create an amazing user account experience.
Customer profile page for WooCommerce
You won't need a profile page for WooCommerce since they've already created a 'My Account' experience for you in the WooCommerce my account page. However, you can customize this page in great detail using Thrive Architect. Check out my tutorial for customizing the WooCommerce my account page.
Customer profile page for ThriveCart
Using ThriveCart, your customer profile experience will be split between your website (using the method shown in the video above) and in your ThriveCart Customer Hub where they will find all of their payment details to manage their accounts.

Integrate Your Other Tools Using Thrive Automator
Connecting Thrive Apprentice to the outside world is incredibly easy with Thrive Automator. Thrive Automator is a free plugin, and part of Thrive Suite, that works very similar to Zapier and other connectivity tools. You start with a trigger, then choose an action.
Let's walk through some of the common recipes you may want to use. One example is a standard autoresponder, and another is a more complex use case managing the connection between our sales cart tool (SureCart), Thrive Apprentice and our external community tool (Circle) together.
Add students to email lists and tags when they buy a Thrive Apprentice course
Important Note: If you already have your students from another platform enrolled in your email lists and tagged, consider pausing this automation until after you import them. We're setting this up so that you'll have it ready to go for new signups.
Thrive has an integration with most of the major email providers already, so connecting them is easy. Go to your Thrive Dashboard > API Connection > Add a new connection and find your provider. I use ActiveCampaign for Convology and Fluent CRM for some of my other businesses. Thrive Automator works great with both!
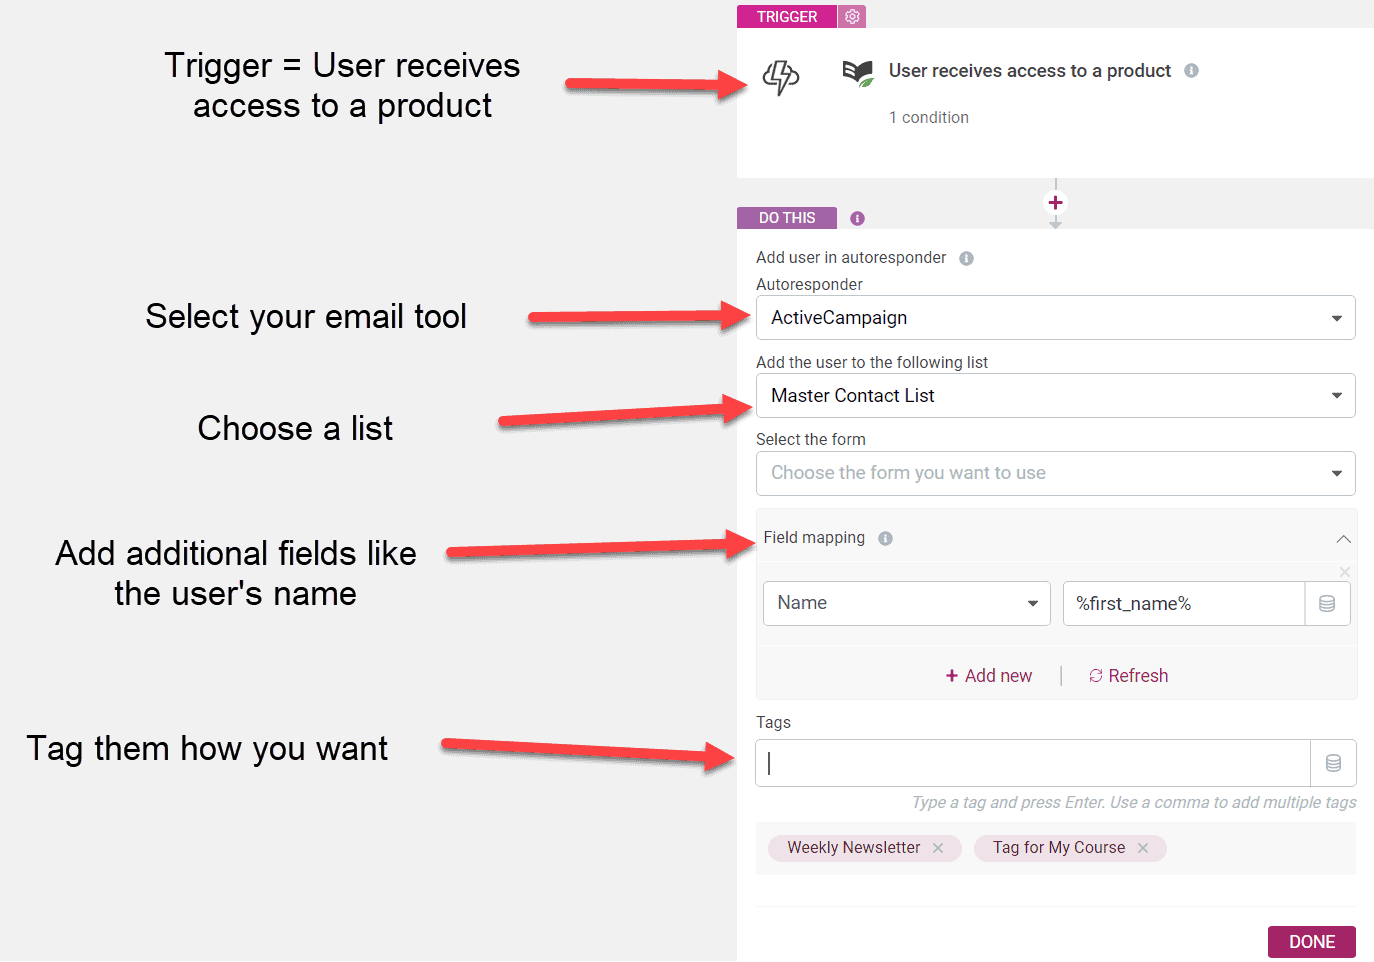
The process of integrating your email tool will generally be as follows.
Trigger: User receives access to a product.
I like to use this one because it covers a wide range of reasons someone gets access. Maybe they got it for free because you granted them access. Maybe they bought it through your ThriveCart funnel.
Action: Add User in Autoresponder
Here you'll choose your email tool. I'm choosing ActiveCampaign. I'll select the list they should go on, and expand the Field Mapping toggle so that I can send their first name over to ActiveCampaign as well. The little dynamic stacked disks on the right of the field value let you insert dynamic data.
Lastly you can type in the tags (hit enter after each one) that you want users to receive when they get access.
Do Something After Access is Revoked or a Subscription is Cancelled
This next example is very flexible and can be adapted to whatever your use case(s) may be. In my example here I'm going to send a webhook to Zapier to remove someone from my community when they cancel. My community tool (Circle) integrates really well with Zapier and I have some other automations set up there that I like. Thrive Automator does a great job sending the signal we need over to Zapier.
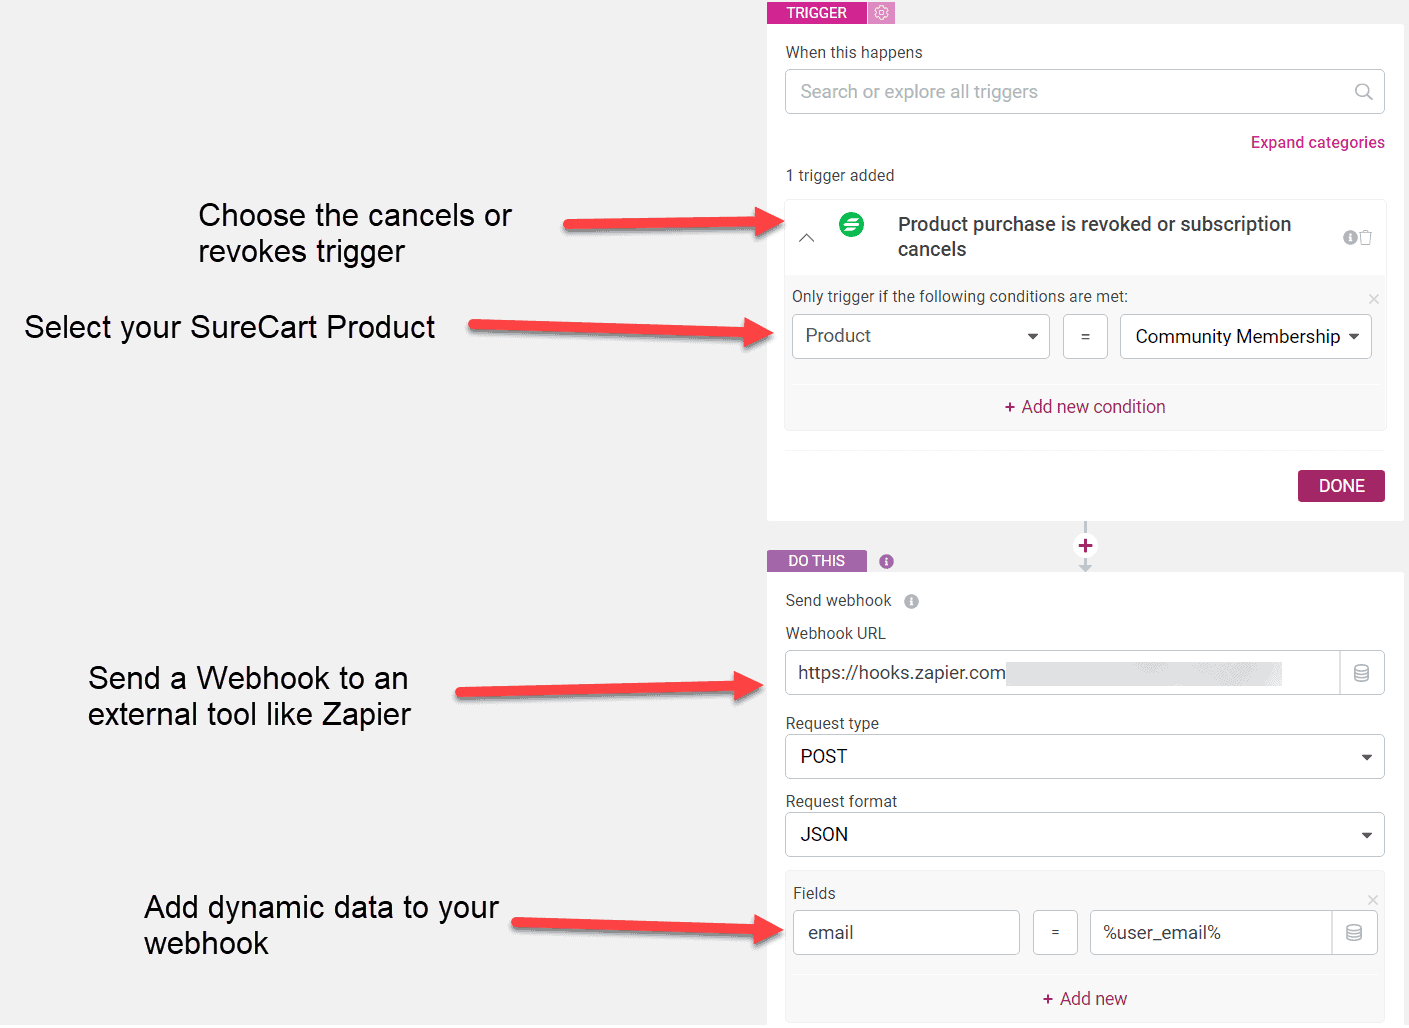
Trigger: Product purchase is revoked or subscription cancels
In this example our user has a subscription managed by SureCart. That's great! SureCart integrates extremely well with Thrive Apprentice. When the user cancels their subscription, or maybe we revoked their access for some reason, we want some things to happen.
Action: Send webhook
In this case, we'll send a webhook first because we want to revoke their access to our external community tool. We already have our Zapier "receive webhook" trigger set up, so we just need to paste in our webhook URL.
Action: [Thrive Apprentice] Remove Access from Product
Select the product associated with the cancellation so that they are removed from the product in your site as well.
Action: [Email] Tag in Autoresponder
Tag the user as cancelled.

Send an Email to Existing Users About the Migration
Communication before you migrate is key. I've helped many people migrate their courses and memberships, and everyone always gets positive feedback from their customers about the communication they provided PRIOR to the move.
Coming from a Non-Wordpress Site
If your users are being migrated from an external platform, such as Teachable, then I recommend you inform them ahead of time that you will be migrating platforms and providing them with a new account that they will use to log in.
I recommend you send this at least two weeks ahead of your expected migration, then send them another email three days before the migration to remind them. You may even want to plan ahead and schedule a third email to go out after you've migrated everyone to let them know they should have received their login credentials (more on this in the Import section below).
Users already on your WordPress Site
If you were previously using a WordPress-based platform, you can and should still send your users an email to inform them that you will be migrating. This buys you a bit of grace with them if something doesn't go perfectly smooth during the transition. They'll be expecting it.
Publish Content & Test Access
If you had any content in draft mode, it's now time to publish your content.
You should also add a tester user (Thrive Apprentice -> Customers) and log in as the user to make sure the flow looks right and everything looks good.
Import Users to Thrive Apprentice
Now it's time to import your users! This is the big moment when users will be notified about their new accounts and how to log in to access their content.
How to Migrate Users into Thrive Apprentice
Users will be migrated using a CSV file. All platforms should provide you with a list of your users in CSV format. I recommend downloading your users into smaller lists based on the products or courses they have access to in your old platform because this will line up with your new Thrive Apprentice products.

In Thrive Apprentice to go Customers, then click on Import Customer in the top right. Choose CSV.
Next you need to choose which products to assign to the imported list of users.
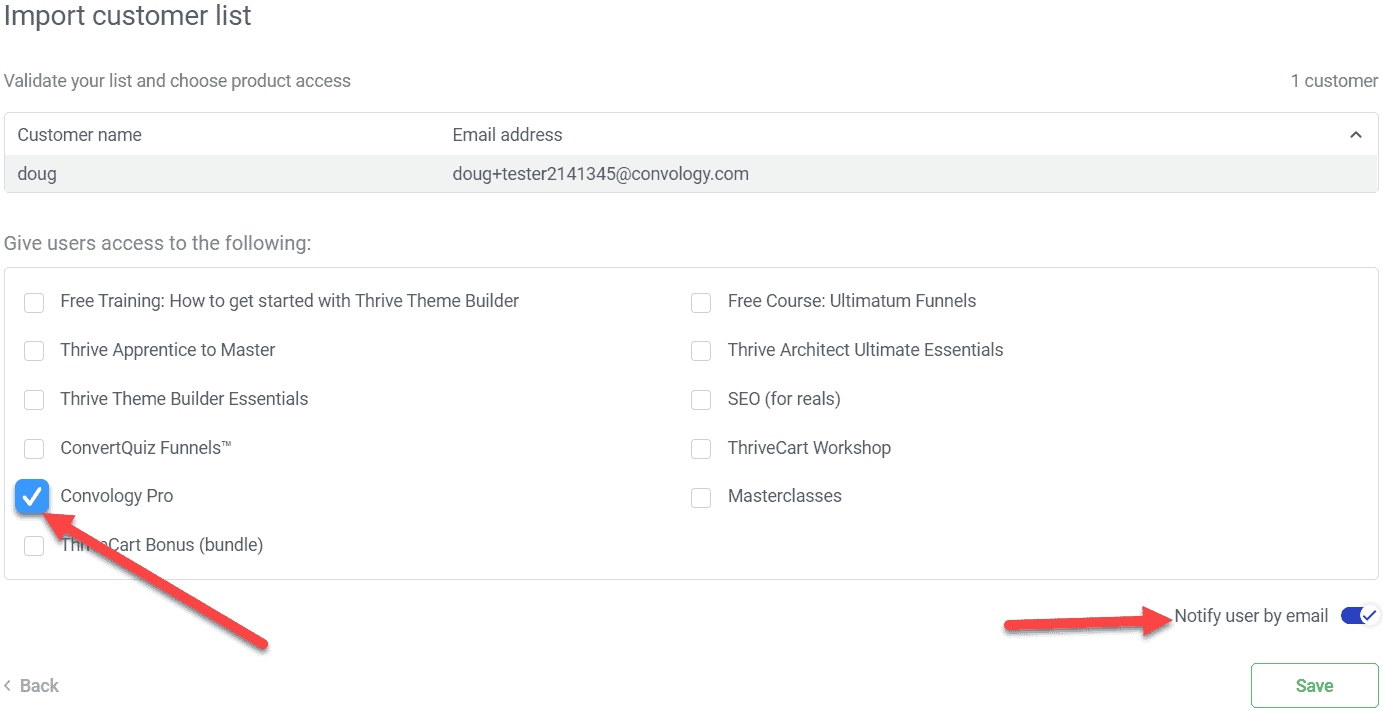
SUPER IMPORTANT: Be sure to check the box "notify user by email". If you don't check this box then the users WILL NOT receive their email with their account credentials and you will have to delete them and reimport them.
Import One Group at a Time
You should import your users in groups based on the products they should get access to. Remember, I recommended you download multiple CSV files broken out by products. Import them one at a time and check the box for the products that line up with each group's access.
Existing Users on your WordPress Site
You still need to import users into Thrive Apprentice even if they have existing accounts on your website. This won't create new accounts for them. What it will do is attach their WordPress account to their Thrive Apprentice products.
These users will not receive an email from the system, so you need to send them one to inform them that you have completed the migration to the new platform and they can log in using the same credentials they've always used.
About Migrating Payments
One of the harshest realities about migrating is the billing component. There's no way to migrate billing from one platform to another, and Thrive Apprentice doesn't have a billing component because it integrates with other payment platforms (the largest in the industry). So either way, regardless of where you migrate, you aren't bringing your billing data. This is an industry norm.
Here are my quick notes on several different scenarios to get you started in the right direction.
- One-time purchases - One-time purchases are easiest since we don't need to continually make sure someone is paying us for access to our stuff. If receipts and invoices will be lost when you cancel, you'll want to let people know they have X days to download their invoices and receipts from the old system. If you don't have thousands of customers, considering downloading a backup to provide them in the future. Some platforms let your students keep access to billing info even after you've cancelled.
- Subscriptions in Stripe - Leave them. Thankfully you can manage them through Stripe. You can create zaps to manage cancellations by triggering a webhook to Thrive Automator.
- Subscriptions in other platforms - If the platform you're leaving managed your subscriptions and did not create them in Stripe, you'll need to migrate your users to a new platform. You can do this at their renewal date and migrate them slowly or have everyone create their new subscription in the new platform right away by prorating (which is a ton more work). Inevitably, there will be churn involved with this type of migration.
- Subscriptions & One-time Purchases in ThriveCart - This is great. They can stay in ThriveCart. You'll only need to manage cancellations because they won't be set up to trigger access removal in Thrive Apprentice. New customers will be, though, when you configure your Thrive Apprentice funnel for new students.
Additional Resources
If you're preparing for a migration and need additional help, I recommend you check out Convology Pro or the Convology Community Membership. Both of these resources will be invaluable to you as you make the switch and get your business running in Thrive Apprentice.